
This tutorial will show you how to set up a JetHost PRO email account on an Android 8x device.
We will be using a test email account email@yourdomain.com. Of course you will have your own email address so substitute that in the appropriate places.
NOTE: Before proceeding, make sure you have a mailbox created.
To set up your account, follow these steps:
1. Locate Settings on the main screen of your Android phone and go to the Users & accounts section.

2. Tap on Add account and select Email

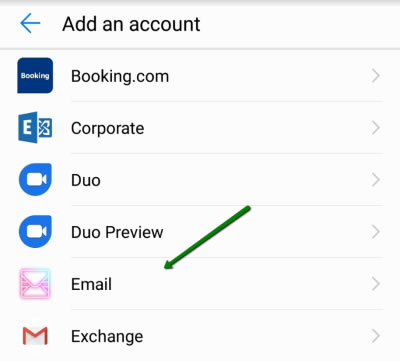
3. Enter your full Email address and respective password in the appropriate fields:

Click Sign in.
4. Select protocol type: IMAP or POP3.
POP3, short for Post Office Protocol, is designed to simply access a remote email server. POP works by downloading your emails from your provider's email server to a specific email client and then marking them to be deleted there. This means you can only ever read those email messages in that email client, on that computer. You will not be able to access any previously-downloaded emails from any other device, or with any other email client, or through webmail.
IMAP, short for Internet Message Access Protocol, is designed specifically to eliminate any POP3-related limitations. IMAP allows you to access your emails at any time from any client, device, or webmail login, until you decide to delete them. You can also use different devices and email/webmail clients to access the same mailbox in order to check, send, and receive email, which is not available with POP3 connections.
This being said, we strongly recommend you select IMAP:
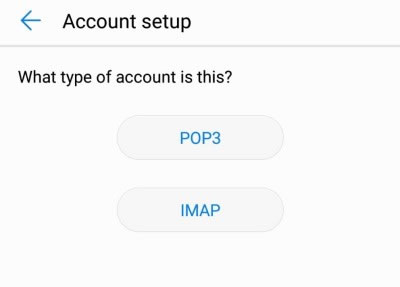
5. If you choose the IMAP protocol, you will need to provide the following details:

Your Email address, username, and password should already be filled in the corresponding fields.
- Server: imap.stackmail.com
- Port: 993
- Security Type: SSL/TLS
Click Next.
6. If you choose the POP3 protocol, you will need to provide the following details:
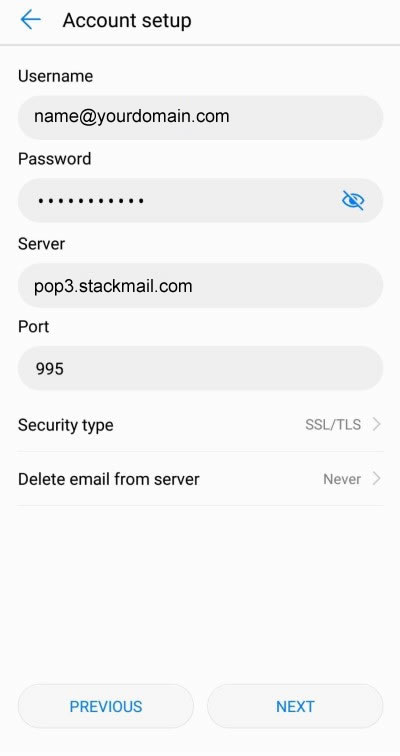
Your email address, username, and password should already be filled in the corresponding fields.
- Server: pop3.stackmail.com
- Port: 995
- Security type: SSL/TLS
Click Next.
7. Enter the settings for the outgoing SMTP server in the following way:

Your email address, username, and password should already be filled in the corresponding fields.
- SMTP server: smtp.stackmail.com
- Require sign-in: should be checked
- Port: 465
- Security type: SSL/TLS
8. Click Next to finish the setup
Good news! You’re all set up.